Tasty Goodness – The Cheesecake Edition
 The time to resurrect the Tasty Goodness series has arrived. (Easter pun…I couldn’t resist.) For Easter, I decided I wanted to try out something new. Sunday dinners at my parents’ house are nothing new, but whether it was a need to do something special to commemorate the holiday, an intense desire for cheesecake, or just a craving for expanding my skills, I decided to make a cheesecake from scratch.
Somewhere along the line, I’d gotten it in my head that cheesecakes were really hard to make, so I’d never tried it. My spring form pan sat empty for two years because I just didn’t know if I wanted to make an attempt only to fail miserably.
Inspired by my new “what’s the worst that can happen” attitude (I’ll talk about that more in another post), I set out on a mission for a good cheesecake recipe. Fortunately, I work with some great people who hooked me up.
My recipe comes from a cookbook published by a local private school the year I graduated from High School, and I’m making copies of just about everything in there. It all looks so very good! I mixed and matched a couple of recipes to get to what I wanted (my sister requested chocolate).
- Crust:
2 Cups Chocolate Cookie Crumbs - ¼ cup granulated sugar
- 6 T unsalted butter (melted)
- 1 Cup semi-sweet chocolate chips
Preheat oven to 325. Combine all ingredients in a bowl, and press into the bottom and sides of a 10 in spring form pan. Bake for 7-10 minutes.
Jessica’s Notes:
- I used chocolate graham crackers to avoid the creamy filling of a cookie like Oreo s. Don’t ask why, I just decided this was important when I was at the grocery store. It had absolutely nothing to do with the “Avengers” Chocolate Grahams…
When it came time to decimate the “Avengers” into usable crumbs, I started out with my hand powered food processor…15 minutes later I had chunks that were still too big to use and a very tired arm. I dumped everything into a large plastic zippered back, and took my grandmother’s rolling pin to it. This was much more effective. (Also, you can release some frustration if you want to.)
- I would like to say that I used mini-chips instead of regular size because of some well thought out…thing. Truthfully, that’s what I had on hand. However, if you aren’t a fan of a thick crust, then mini-chips are the way to go.
- My pan is 9 inches instead of the 10 inch pan called for in the recipe, and I had no idea how I was going to get this stuff to stick to the sides of the thing long enough to cook. Therefore, I didn’t do that part. My crust was on the bottom only, and there was a bunch of crust mixture left over. At least enough for the bottom of another cheesecake.
- If you’re going to use a water bath (recommended) to cook your cheesecake, go ahead and wrap your pan tightly in foil now. Otherwise your fingers will get a bit warm and you will curse your lack of forethought when the pan hasn’t cooled enough and you’re ready to back the cheesecake…not that I learned that the hard way or anything.
 Cheesecake:
- 5 8oz packages of cream cheese (no, that isn’t a typo)
- 3 large eggs
- 1 ½ cup granulated sugar
- 1 T pure vanilla extract
In a food processor, combine the eggs and sugar until smooth. Add vanilla and set aside in a mixing bowl. Cube cream cheese into 1 inch cubes and process half the cream cheese until smooth. Add the sugar mixture until smooth, before adding second half of cream cheese cubes. Process until smooth and pour onto crust. Bake at 350 for 30-45 minutes. Cheesecake is done when firm to the touch but jiggles in the middle. Allow to cool on a wire rack, and then wrap tightly and refrigerate over night.
Jessica’s Notes
- I don’t have an electric food processor. I have a small 3 cup processor with a handle you press down to make the blade spin, so when I first read these directions it was not just a “nope” but a “hell, no”. I’d still be trying to process cream cheese. Fortunately, I could see from margin notes that my recipe-source had made this before. No food processor is necessary, a good mixer is a definitely requirement though.
- Cube your cream cheese smaller than 1 inch if you don’t have a food processor. That will help with the creaminess. It will also keep you from overworking the batter. I don’t know what happens if you overwork the batter, but lots of recipes online made it sound like a bad thing.
- Don’t worry about adding the ingredients in batches. I processed the eggs, sugar and vanilla and set it aside until the cream cheese was nice and smooth, then poured the whole lot in the bowl.
- Make sure you don’t over mix the eggs and sugar…you’ll end up with meringue. Also, make sure you scrape the bottom of the bowl to get all the sugar that settled while you were waiting for the cream cheese to become creamy.
- Drop the cheesecake gently on the counter/table a couple of times to make sure all the large air bubbles pop.
- Use a water bath to avoid the cheesecake from cracking on top (also don’t over cook it). Make sure your pan is wrapped tightly with foil, and place a large baking pan (I used a cake pan) filled ¾ of the way with water in the oven while it preheats. Be very careful when you lower and remove the cheesecake. The water is boiling!
- These guys must have been using a super oven powered by the Human Torch to get it to bake in 30-45 minutes. It took a little more than an hour for this to bake. I started checking every 10 minutes and then every 5 minutes until I thought it was done. It was done probably 5-10 minutes before I thought it was…my cheesecake top cracked. Oh well. That’s what the chocolate ganache was for!
 Ganache
- 1 cup heavy cream
- 5 oz Germans Sweet Baking Chocolate (shaved/curled)
Add the chocolate curls to boiling cream. Stir until the chocolate is completely melted. Refrigerate for several hours. Whip until light and fluffy.
Jessica’s Notes
- Shave/curl all of your chocolate ahead of time. It does not take cream as long to boil as you think it will…or as long as I thought it would.
- Keep the paper on the chocolate bar as you shave it to use as a handle. This may be obvious to everyone else, but chocolate melts when it encounters warm objects. My hands are not as cold as my ex says they are. They do melt chocolate.
- Use a flexible cutting board to do this. Shaved/curled chocolate melts a lot faster than you think it will…not that licking some of the melted chocolate off your fingers isn’t tasty, but…really. Flexible. Cutting. Board.
- I have no idea how to “curl” chocolate. All of my attempts ended in shaved shards. I was bothered by this until I realized it was going to be melted and no one would see it. This epiphany took much longer to come about than it should have.
- Stir this stuff constantly…make sure your cream doesn’t scorch. These were also palm to forehead moments. Mine came out with a texture that isn’t as smooth as I would have liked, but when I asked my mom about it she told me that it didn’t stay on her tongue long enough to worry about the texture. She was too busy eating it.
Presentation:
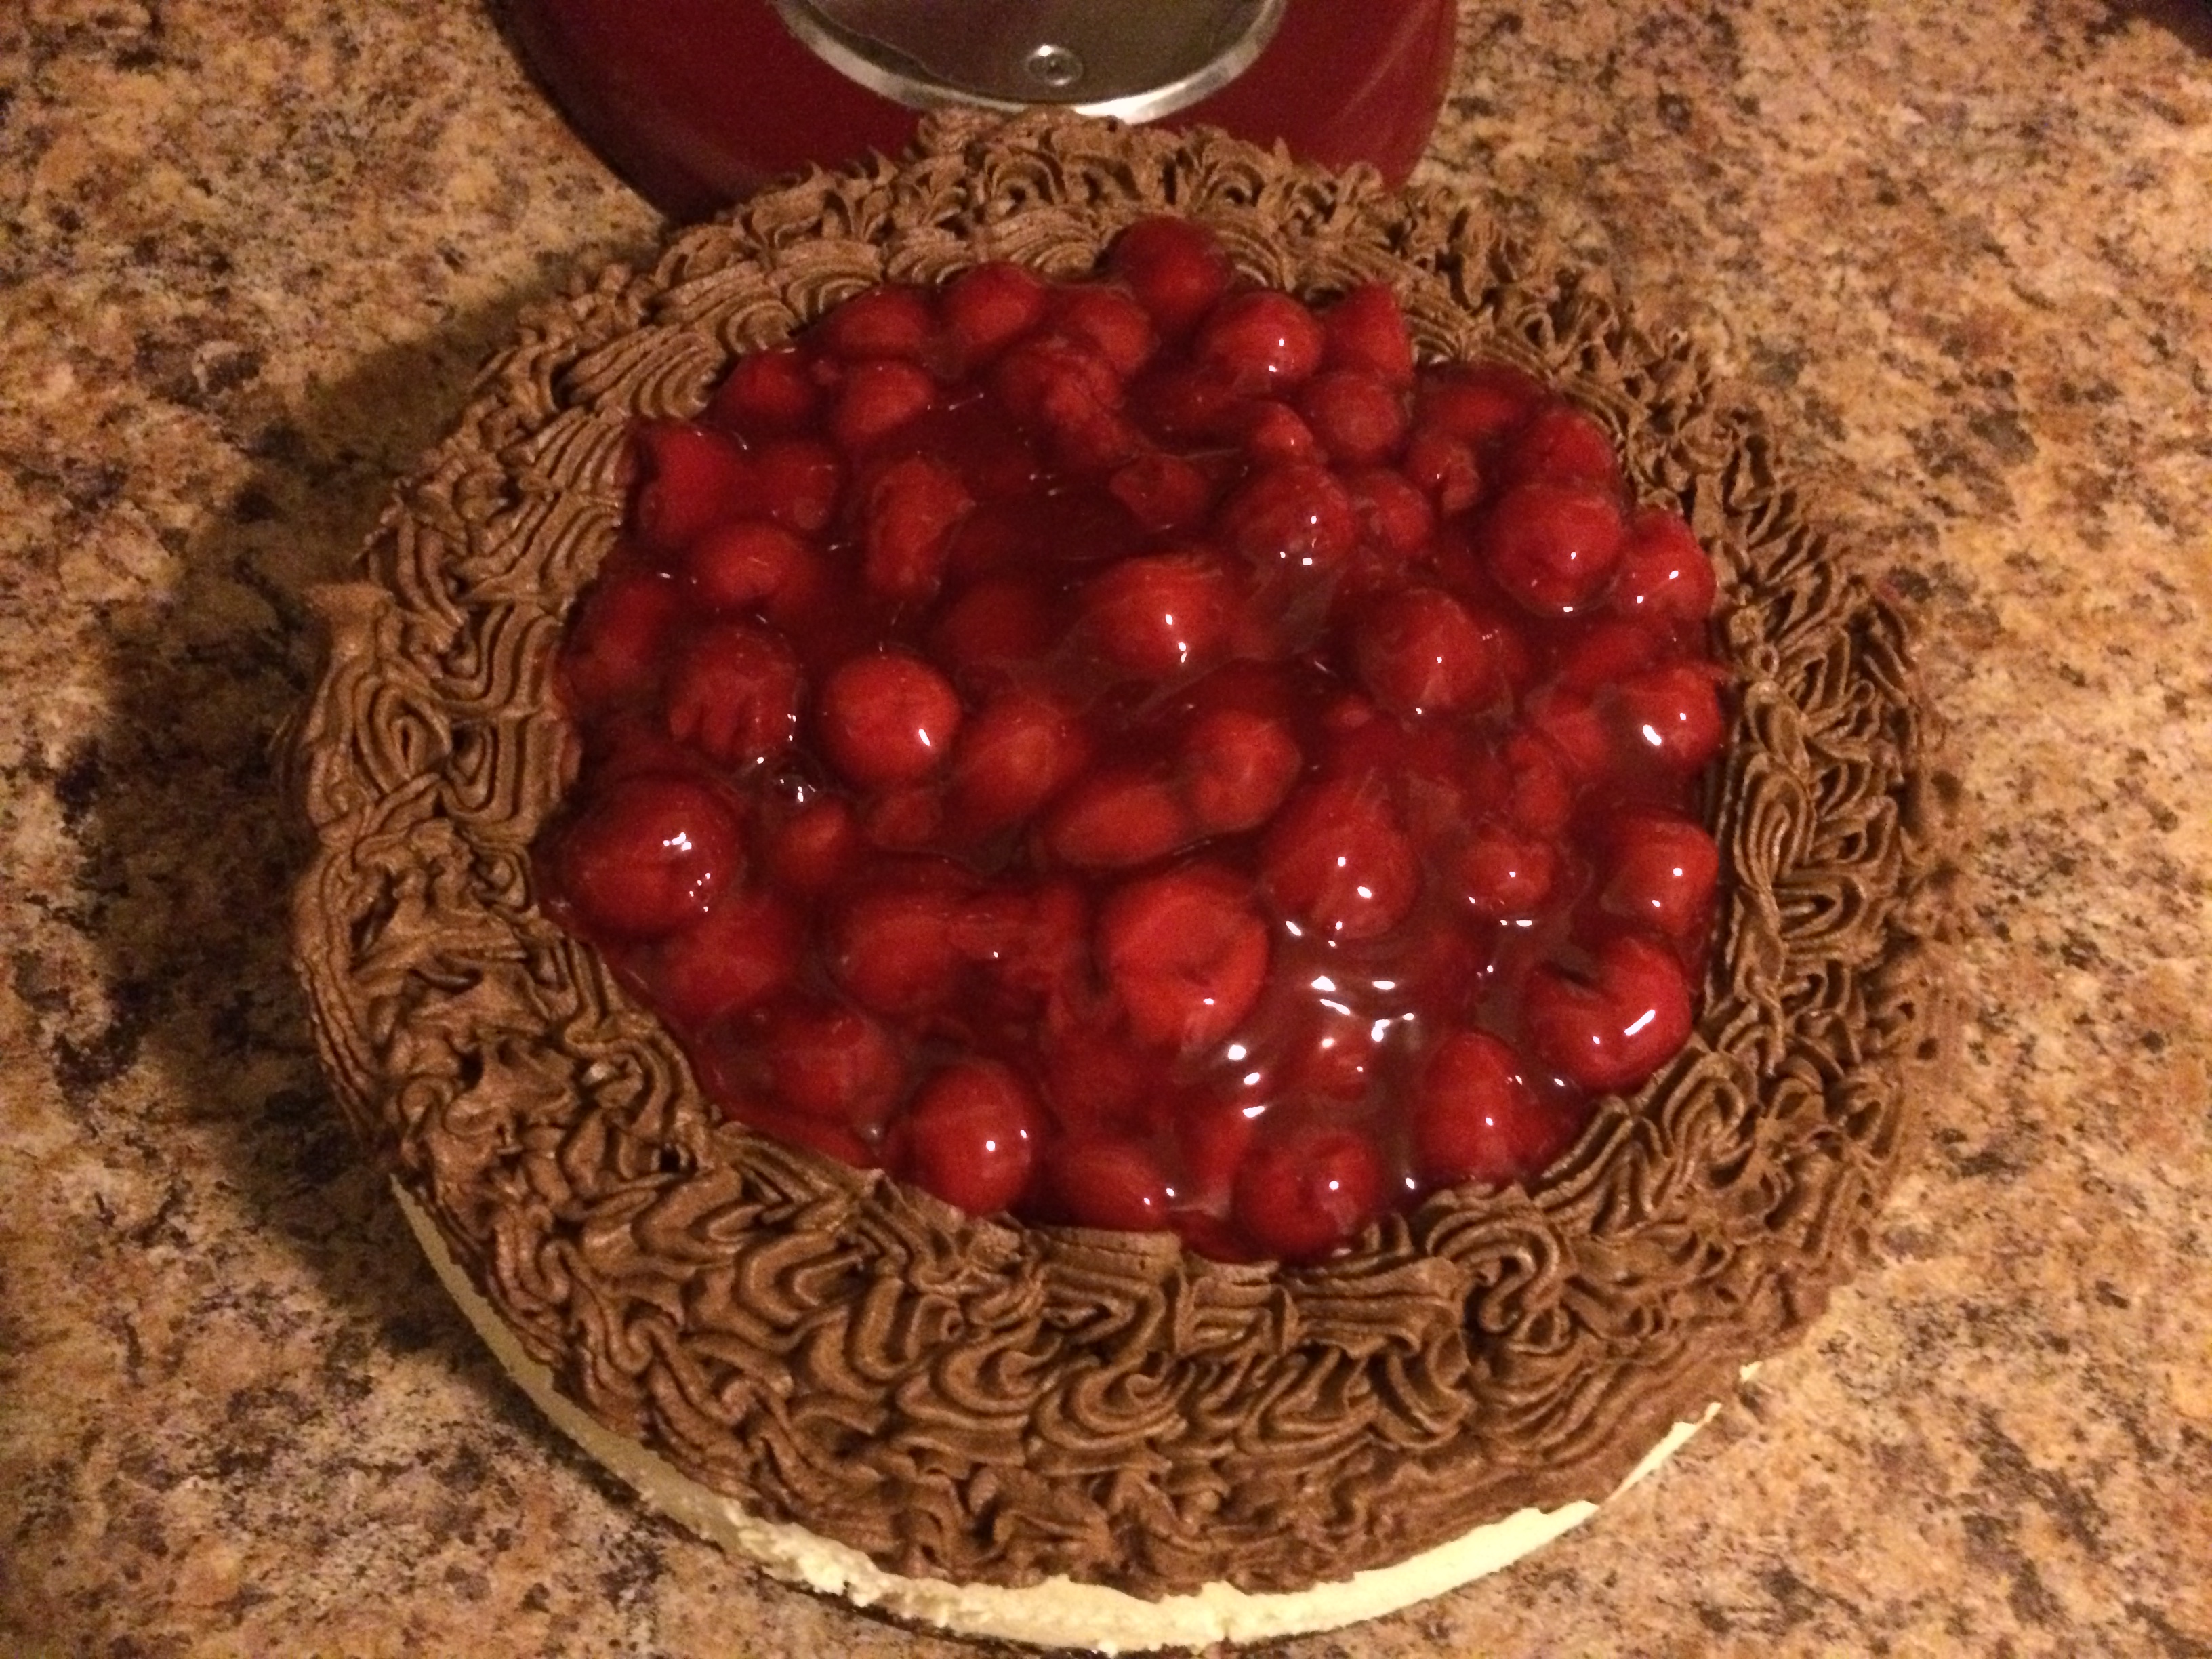
- I piped the ganache around the edges of the cheesecake until all the ganache was gone. (It really did taste divine). The decorated edge also had the added benefit of corralling the cherries that I put in the center.
- I used the canned cherries that I also used in my Cherry Cheesecake Pie recipe.
- Removing the spring form ring from around the cake wasn’t bad. I just ran a thin paring knife around the edge to make sure it detached. However, if you’re trying not to mess up your decorating during moving, just leave it on there. (trust me)
- The cherries will move during transport. Maybe you should put them on once you arrive at your destination.
There is no need to fear the cheesecake (well, unless you are unable to eat this goodness in moderation…in which case you should definitely fear homemade cheesecake!) This really wasn’t nearly as hard as I thought it would be, and it was really light and fluffy and creamy. Two bites in and my mother requested this for her birthday (I’m not allowed to make any changes or “improvements”). The leftovers were coveted, and disappeared quickly. Luckily for me, my family is kind and generous, and they left me enough for two small pieces … as a matter of fact, there is one leftover piece waiting for me at home … maybe I’ll go home for lunch.
‘Til next time,
Jessica
P.S. Now I’ve immersed myself in cheesecake recipes. I found a Irish Cream Cheesecake…using my homemade Irish Cream? Yes, please!

